Computer vision : object detection and identification with Python, OpenCV and YOLOv4. Part 2 : video processing.
In the first part, we have seen how to implement object detection and identification in images, using Python, OpenCV and YOLOv4.
We will now extend this detection to videos: we will pass them to our script in order to detect and identify the objects that appear in them.
The detection principle will remain the same, except that we will process sequences of images instead of single images. The detection will be applied on each frame.
For each analyzed image, we will list the detected objects.
Projet structure
The main script will be named yolo-video.py
					tree
.
|____input
| |____test.avi
|____output
|____yolo-files
| |____coco.names
| |____yolov4.cfg
| |____yolov4.weights
|____objectdetector
| |______init__.py
|____requirements.txt
|____yolo-video.py
- Python dependencies:
Create a file named requirement.txt with the content below:
numpy
opencv-python
Then install the required modules:
pip install -r requirements.txt
- YOLOv4 components:
The yolo-files folder contains the files that define the YOLOv4 algorithm. Install the files in the same way as in part 1.
The code :
Edit the ./objectdetector/__init__.py script so that it contains the following:
					import cv2
import numpy as np
import os


class YoloObjectDetector:
    def __init__(self, yolo_path) -> None:

        with open(os.path.join(yolo_path, "coco.names"), "r") as f:
            self.labels = f.read().splitlines()

        self.colors = np.random.uniform(0, 255, size=(len(self.labels), 3))

        net = cv2.dnn.readNetFromDarknet(
            os.path.join(yolo_path, "cfg/yolov4.cfg"),
            os.path.join(yolo_path, "weights/yolov4.weights"),
        )
        self.model = cv2.dnn_DetectionModel(net)

        self.model.setInputParams(scale=1 / 255, size=(416, 416), swapRB=True)

    def process_image(
        self,
        image,
        detection_threshold=0.5,
        non_maximum_suppression_msthreshold=0.5,
    ):
        classids, scores, boxes = self.model.detect(
            image,
            confThreshold=detection_threshold,
            nmsThreshold=non_maximum_suppression_msthreshold,
        )
        texts = []

        for (classid, score, box) in zip(classids, scores, boxes):
            cv2.rectangle(
                image,
                (box[0], box[1]),
                (box[0] + box[2], box[1] + box[3]),
                color=self.colors[classid],
                thickness=2,
            )

            text = "%s: %.2f" % (self.labels[classid], score)
            cv2.putText(
                image,
                text,
                (box[0], box[1] - 5),
                cv2.FONT_HERSHEY_SIMPLEX,
                1,
                color=self.colors[classid],
                thickness=4,
            )
            texts.append(text)
        return texts
					import cv2
import argparse
import os
import math
from objectdetector import YoloObjectDetector


def parse_args():

    parser = argparse.ArgumentParser(description="Process some images")

    parser.add_argument(
        "-i", "--file_source", required=True, help="path to source video"
    )
    parser.add_argument(
        "-s", "--step", type=int, default=1, help="image step (default=1)"
    )
    parser.add_argument(
        "--view_output",
        action="store_true",
        help="view output",
    )
    parser.add_argument(
        "--no-view_output",
        action="store_false",
        help="don't view output",
    )
    parser.add_argument(
        "--save_output",
        action="store_true",
        help="save output",
    )
    parser.add_argument(
        "--no-save_output",
        action="store_false",
        help="don't save output",
    )
    parser.add_argument(
        "-o",
        "--output",
        default="output",
        help="""path to output files (default="output")""",
    )
    parser.add_argument(
        "-y",
        "--yolo_path",
        default="yolo-files",
        help="""path to yolo files (default="yolo-files")""",
    )
    parser.add_argument(
        "-d",
        "--det_threshold",
        type=float,
        default=0.5,
        help="detection threshold (default=0.5)",
    )
    parser.add_argument(
        "-n",
        "--nms_threshold",
        type=float,
        default=0.5,
        help="non-maximum suppression threshold (Default=0.5)",
    )
    return vars(parser.parse_args())


def main():

    args = parse_args()
    detection_threshold = args["det_threshold"]
    non_maximum_suppression_msthreshold = args["nms_threshold"]

    detection_model = YoloObjectDetector(args["yolo_path"])
    capture = cv2.VideoCapture(args["file_source"])

    if args["save_output"]:
        output_video_path = args["output"]
        video_name = args["file_source"]

        output_file_name = os.path.join(
            output_video_path,
            os.path.splitext(os.path.basename(video_name))[0] + "_output.avi",
        )
        frame_width = int(capture.get(3))
        frame_height = int(capture.get(4))
        size = (frame_width, frame_height)
        output_video = cv2.VideoWriter(
            output_file_name, cv2.VideoWriter_fourcc(*"MJPG"), 10, size
        )

    while not capture.isOpened():
        capture = cv2.VideoCapture(args["file_source"])

        cv2.waitKey(1000)
        print("Wait for the header")

    for i in range(0, int(capture.get(cv2.CAP_PROP_FRAME_COUNT)), args["step"]):
        capture.set(cv2.CAP_PROP_POS_FRAMES, i)
        _, input_frame = capture.read()
        output_frame = input_frame.copy()
        detected = detection_model.process_image(
            output_frame,
            detection_threshold,
            non_maximum_suppression_msthreshold,
        )
        if detected:
            print(
                str(math.ceil(capture.get(cv2.CAP_PROP_POS_MSEC) / 10) / 100),
                "seconds",
                detected,
            )
        if args["view_output"]:
            cv2.imshow("output_frame", output_frame)
        if args["save_output"]:
            output_video.write(output_frame)
        if cv2.waitKey(10) & 0xFF == ord("q"):
            break

    capture.release()

    if args["save_output"]:
        output_video.release()
        print(output_file_name, "created")

    cv2.destroyAllWindows()


if __name__ == "__main__":
    main()
The script can be launched with the following parameters:
-h displays a quick help on the parameters,
-i is followed by the path of the video,
-s is followed by the step between two processed frames,
-o if followed by the path to the folder where the output video will be saved
-y is followed by the path of the folder that contains the YOLO model files,
-d is followed by the detection threshold (0.5 by default),
-n is followed by the non-maximum suppression threshold.
–view_output / –no-view_output : show / hide output video
–save_output / –no-save_output : save or not the output video
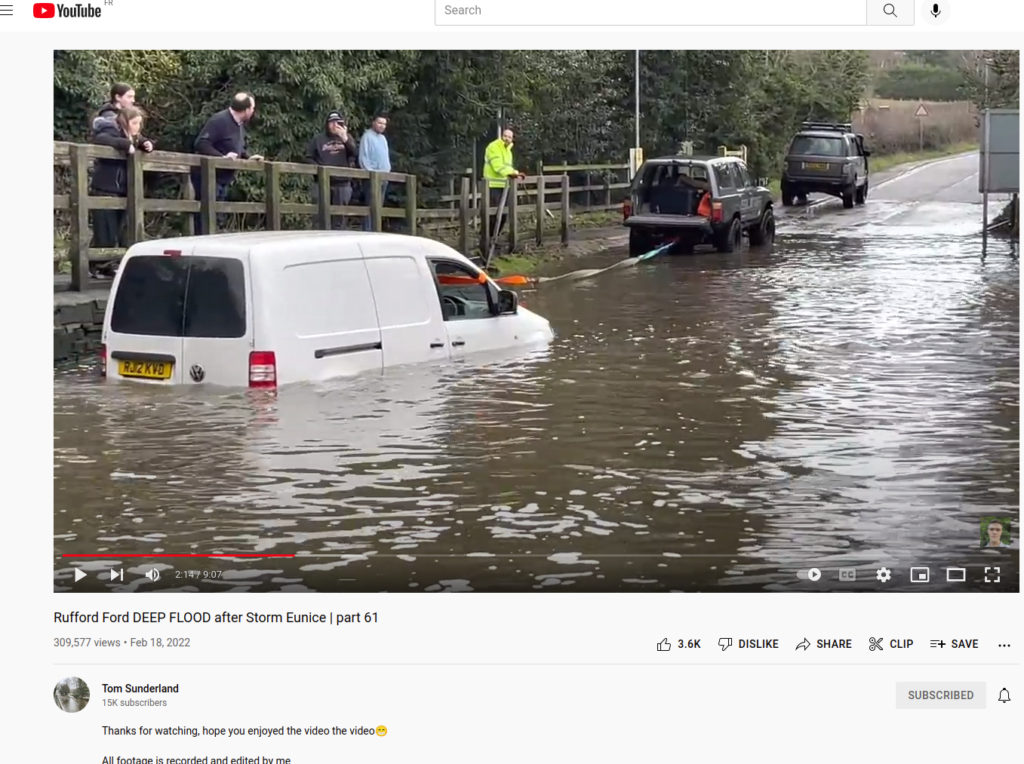
Copy a video to the input folder. Personally I saved a youtube video from Tom Sunderland’s channel that I find very entertaining 😉 I used the youtube-dl utility to do this.
Here is the command I used:
youtube-dl -f 135 https://www.youtube.com/watch?v=V9KZ_IyazWg&t=22s
Once you have a test video, you can launch the script:
python yolo_video.py -i "input/Rufford Ford _ part 64-V9KZ_IyazWg.mp4" --view_output --save_output
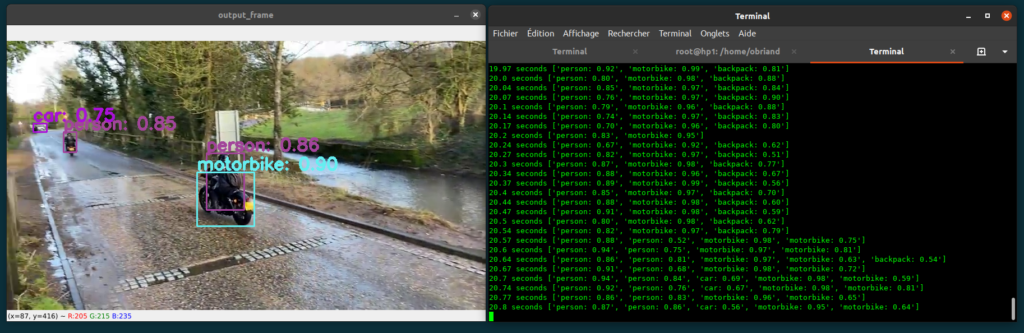
The output of the script is the display of the video including the objects detected and localized by YOLOv4 (option –view_output of the script) and a display on the text console that shows the list of these detected objects and the associated confidence scores , together with the timecode of the analyzed image.
The script also saves the displayed video in the output folder (option –save_output).
How the script works:
The script is divided into two parts:
* An external module, therefore reusable: the objectdetector module which contains the YoloObjectDetector class, already seen in part 1. The process_image function of this class analyses each image. For each of them, an image is generated with the location of each object and the confidence score. The function also returns the list of detected objects and the associated scores for further processing.
* The script yolo-video.py which treats the input parameters, opens the video, decomposes it into images which are treated by the function process_image of the class YoloObjectDetector, then displays and saves the output.
Conclusion:
Thank you very much if you have made it this far.
This script is only a base to show what it is possible to do: we could for example create a database associated to each video which would allow to search for the moments of appearance of objects. We could also trigger actions depending on the appearance of such or such item. One can also analyze live video streams, captured by a webcam..
If you have any suggestions to make this blog or this article better, please send me a message. I will try to make the changes.